 Enjoy your weekend! Amber

Showing posts with label Kids Crafts. Show all posts
Showing posts with label Kids Crafts. Show all posts
Saturday, July 24, 2010
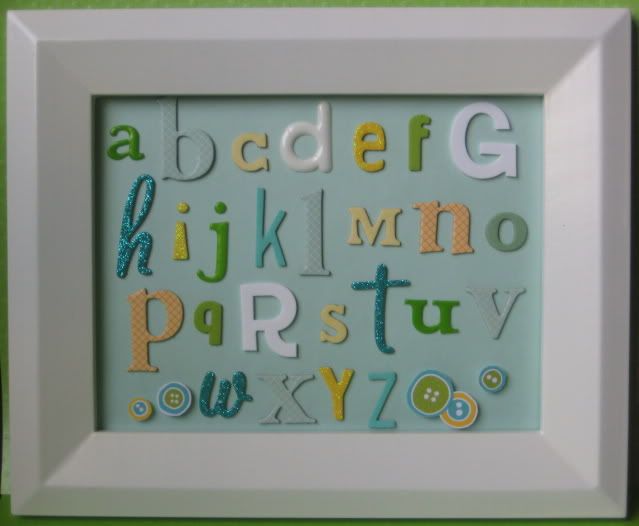
Alphabet Thickers "Print"
I have been enamored lately with all the cute alphabet prints out there for babies...due to my hectic lifestyle, I am figuring if I want babies in the next oh, I don't know, ten years, I better start making stuff now, so...voila! I made my own alphabet "print" version with American Crafts Thickers and a white frame I had on hand...I'm pretty fond of how it turned out! What do you think? Enjoy your weekend! Amber
Enjoy your weekend! Amber

Thursday, May 27, 2010
Recipe/Note Holder
So this is the Mother's Day craft I promised that I am about a month late in posting! Haha! It's a *little* time consuming but only if you make a gazillion like I did...
Paint small terracotta pots on the outside, and little wooden kabobs or skinny popsicle sticks green. While that's drying cut out or find foam, stiff fabric or flower shaped stickers for your flowers. Glue mini clothespins to the back of the dried green sticks, and glue a chunk of foam (obviously doesn't have to be prettily cut!!) to the bottom of your pots.
 Whew. That was the hard parts...then assemble flowers and glue/stick/etc. to the front of the "stems"
 And glue/pin fluffy boa stuff to the top of the foam to cover it up. Cut out little hands (I used my Cricut) and gather bright stickers for children to decorate hands with...once completed use the clothespin to attach the hands to the flowerpots!
  And an example of a finished one:
 Even though it was a lot of work, the kids REALLY loved them and were so proud! Obviously, if you had an older class or children, they could probably do a lot of this themselves, but with 2-3 year olds...not so much! =)
Paint small terracotta pots on the outside, and little wooden kabobs or skinny popsicle sticks green. While that's drying cut out or find foam, stiff fabric or flower shaped stickers for your flowers. Glue mini clothespins to the back of the dried green sticks, and glue a chunk of foam (obviously doesn't have to be prettily cut!!) to the bottom of your pots.
Whew. That was the hard parts...then assemble flowers and glue/stick/etc. to the front of the "stems"And glue/pin fluffy boa stuff to the top of the foam to cover it up. Cut out little hands (I used my Cricut) and gather bright stickers for children to decorate hands with...once completed use the clothespin to attach the hands to the flowerpots! 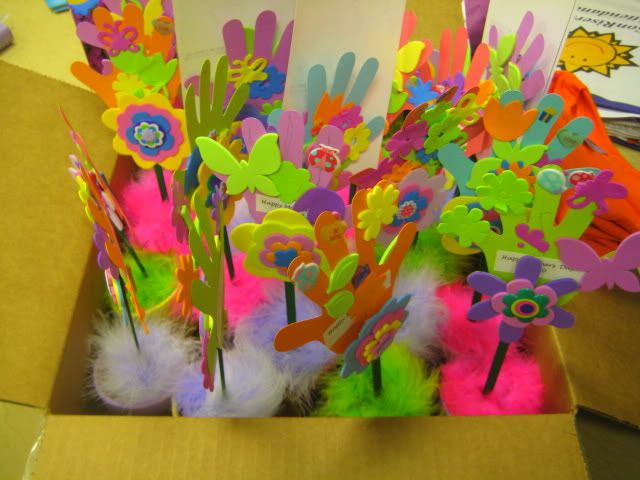 And an example of a finished one:
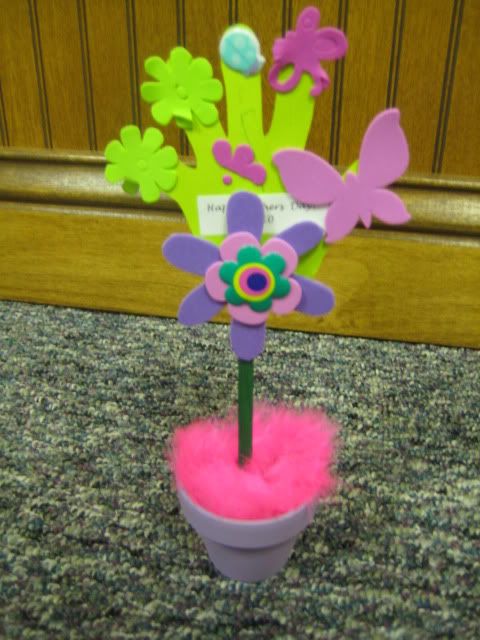 Even though it was a lot of work, the kids REALLY loved them and were so proud! Obviously, if you had an older class or children, they could probably do a lot of this themselves, but with 2-3 year olds...not so much! =)
Thursday, February 25, 2010
They Fished All Night...
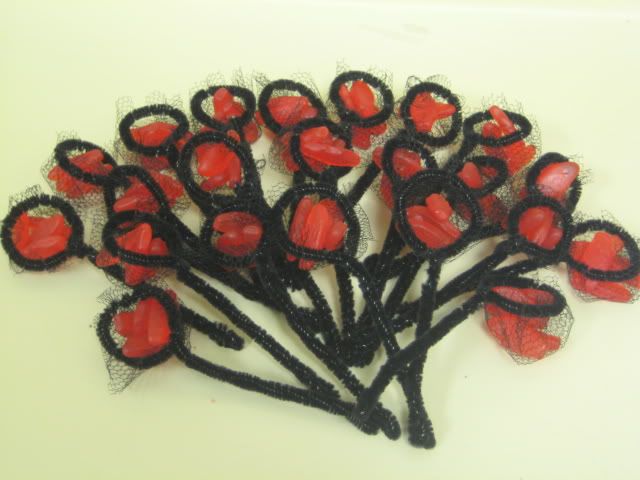
I sewed and stuffed these cute paper fish for my lesson in my Wednesday night class at church...we have been learning about the miracles of Jesus and this particular week we talked about the miracle the disciples experienced after fishing all night and catching no fish...until Jesus came along and told them to cast their nets on the right side...we had a "boat" and fishing net (crab net) and these lovely paper fish....and everyone got a turn to be the disciples....it was really cute and fun. =) I love it when the Lord blesses me with creative ideas!! These were our little activity sheets - scrapbook paper handcut fish, photo squares, and leftover netting from mini nets (below!)...super quick and easy!
 These little nets were my pride and joy...haha...they took about an hour to make, so a bit of a time investment but the kids LOVED them...they kept emptying and filling them back up and singing our little song during snack time. So stinkin' cute.
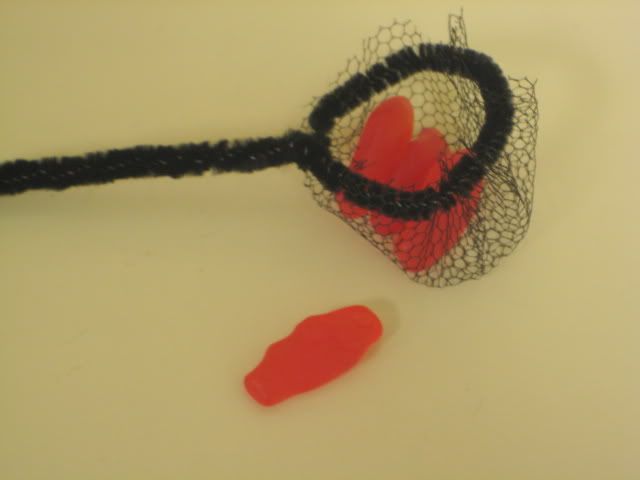
 Here's a closer shot....
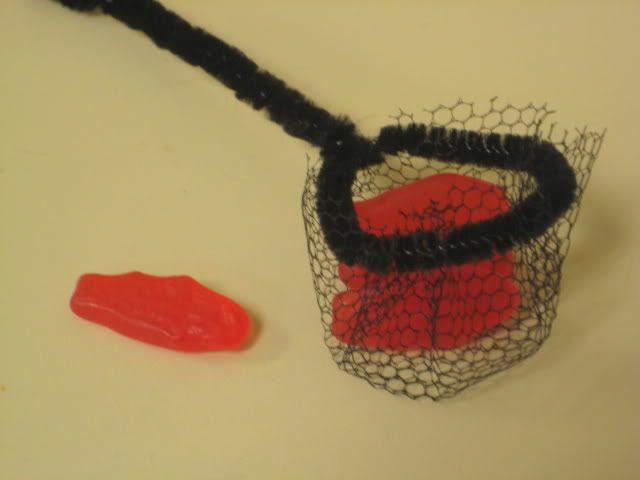
  And another one, haha. Like I said, pride and joy.
 My class has been most of my crafty time lately, but it is so worth it to see their sweet little faces all excited.
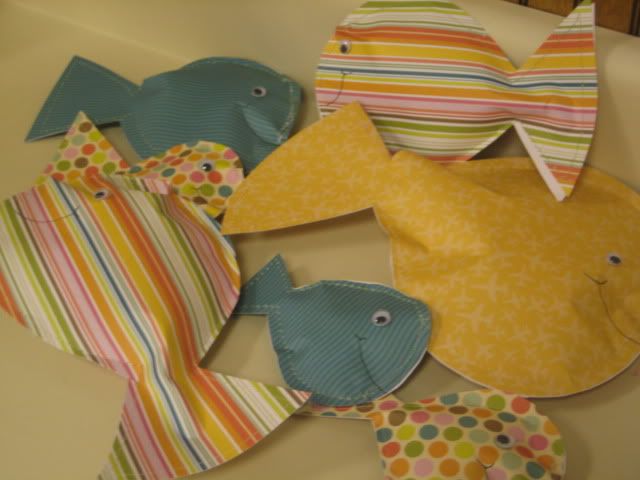 These were our little activity sheets - scrapbook paper handcut fish, photo squares, and leftover netting from mini nets (below!)...super quick and easy!These little nets were my pride and joy...haha...they took about an hour to make, so a bit of a time investment but the kids LOVED them...they kept emptying and filling them back up and singing our little song during snack time. So stinkin' cute.
 Here's a closer shot....
  And another one, haha. Like I said, pride and joy.
 My class has been most of my crafty time lately, but it is so worth it to see their sweet little faces all excited.
Wednesday, October 7, 2009
Paper Dolls
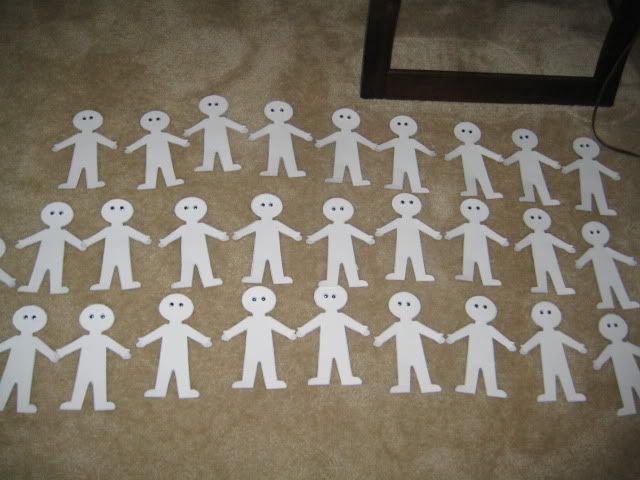
This month's lesson in my class was God made me special, so we made paper dolls. I never remember making paper dolls as a kid, so it was pretty fun (albeit a LOT of cutting!) to do...and I loved how they all looked. Each doll was supposed to look (sortof) like the kid who made it. I found templates for the dolls and clothes online and printed them (with my wonderful wide format printer...thank you, bestest husband!) on 12x12 scrapbooking paper and let the kids pick their own embellishments!


Hope you have a grand day! =)

Hope you have a grand day! =)
Tuesday, September 1, 2009
Very Fun (And Cheap!) Things to Do With Kids!
Hello! So I have decided to compile a little grouping of fun things I like to do with kids that are inexpensive but really funnnn! This first installation is stuff Miss Taylor & Tori did the last time they came over to my house!
1. Keep a box full of fun stuff that you find on clearance. (My boxes have crayons, colored pencils, coloring books, old mini scrapbook kits, color wonder finger paints, long skinny balloons, regular balloons, stickers, kid's meal toys, playdoh, etc.) Pull these out when you really need to get something done (like cook lunch or something) and let them pick a couple of things to play with.
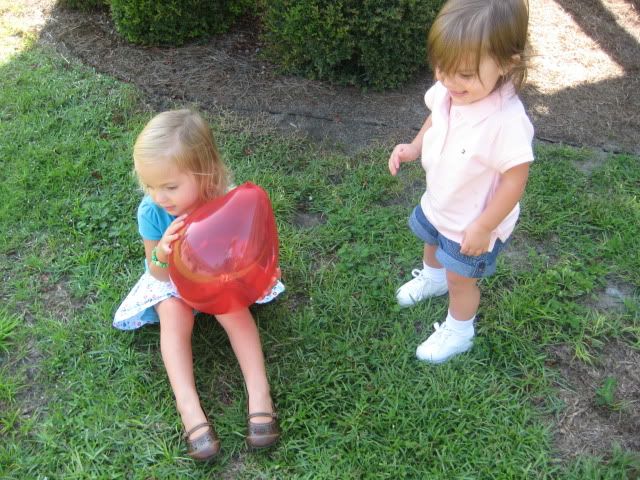
2. Balloons are very fun to these two children...we blew up like 7 of them and had a giant throw-the-balloons-in-the-air-and-chase-them-like-crazy party. P.S. You should do this inside though...this lovely red balloon popped (very loudly) .5 seconds after this picture and two little girls were scared+unhappy about losing their beloved balloon.
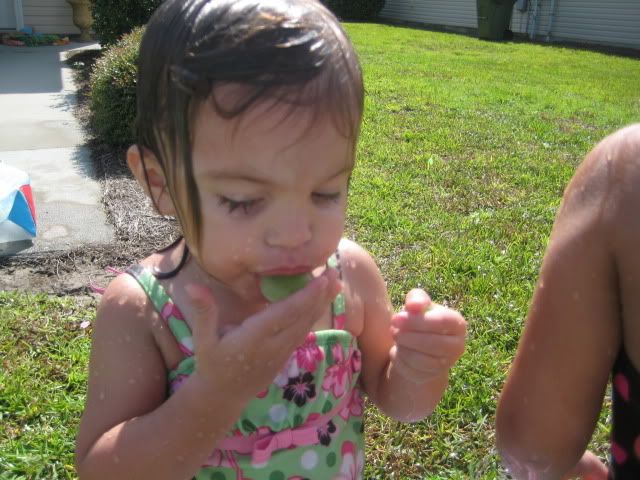
 3. Pour Kool-aid into cheap ice trays shaped like fun things (I have a penguin tray, a heart tray, and a fruit tray)...yum!

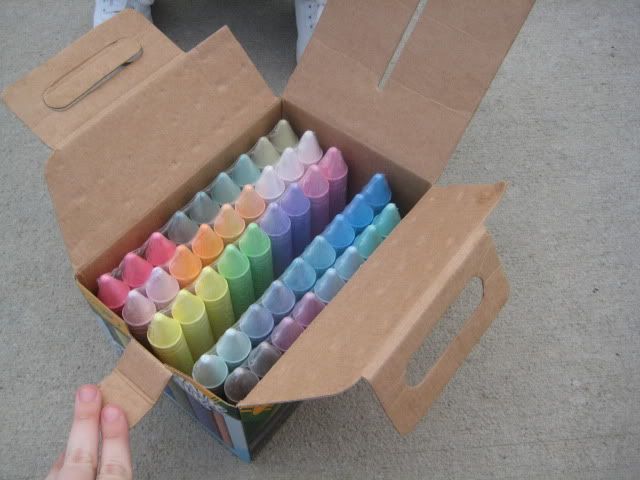
 4. Wait til the end of summer (clearance prices!) and buy a GIANT box of Crayola sidewalk chalk and chalk away. (This box only cost $2.50).
 Draw the kids in the clothes they are wearing, or draw flowers, houses, dogs, cats, bugs, mountains or anything else you can think of! You could make this a weekly activity and take a picture of your creations each week and put in a small photo album as well!
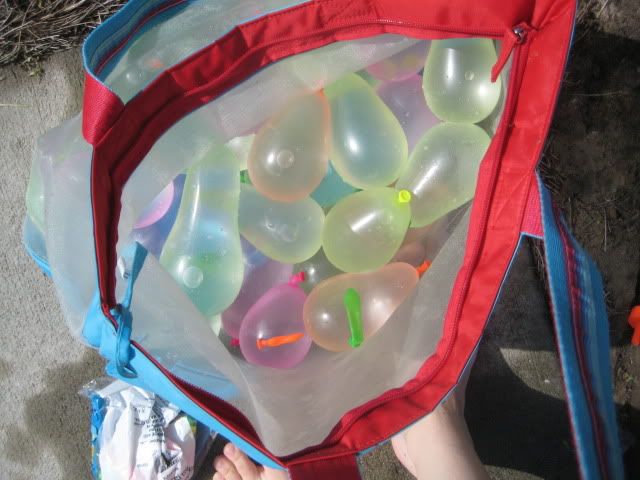
 5. Play with water balloons. It was like $2.50 for 250 water balloons at Wal-Mart. Let yourself get pelted. Just beware...it takes a while to fill/tie them all up and about 1/10 of that time to throw every last one of them. Haha!
 6. Play with beads. Okay, so this might not work for a boy, but for girls, playings with beads and making pretty necklaces is pretty fun. This is also a good quiet time activity! Taylor and I made a bead necklace and bracelet before Tori came over.

1. Keep a box full of fun stuff that you find on clearance. (My boxes have crayons, colored pencils, coloring books, old mini scrapbook kits, color wonder finger paints, long skinny balloons, regular balloons, stickers, kid's meal toys, playdoh, etc.) Pull these out when you really need to get something done (like cook lunch or something) and let them pick a couple of things to play with.
2. Balloons are very fun to these two children...we blew up like 7 of them and had a giant throw-the-balloons-in-the-air-and-chase-them-like-crazy party. P.S. You should do this inside though...this lovely red balloon popped (very loudly) .5 seconds after this picture and two little girls were scared+unhappy about losing their beloved balloon.
 3. Pour Kool-aid into cheap ice trays shaped like fun things (I have a penguin tray, a heart tray, and a fruit tray)...yum!
 4. Wait til the end of summer (clearance prices!) and buy a GIANT box of Crayola sidewalk chalk and chalk away. (This box only cost $2.50).
 Draw the kids in the clothes they are wearing, or draw flowers, houses, dogs, cats, bugs, mountains or anything else you can think of! You could make this a weekly activity and take a picture of your creations each week and put in a small photo album as well!5. Play with water balloons. It was like $2.50 for 250 water balloons at Wal-Mart. Let yourself get pelted. Just beware...it takes a while to fill/tie them all up and about 1/10 of that time to throw every last one of them. Haha!
 6. Play with beads. Okay, so this might not work for a boy, but for girls, playings with beads and making pretty necklaces is pretty fun. This is also a good quiet time activity! Taylor and I made a bead necklace and bracelet before Tori came over.
Well, this is part one of fun things to do with your kids or when your keeping someone else's kids (like me!)
Hope you have a great day!
Friday, May 1, 2009
Itty Bitty Hairbows Tutorial
Supplies Needed:
Hairclips (got mine at Hobby Lobby for around $1)
Quick dry glue, preferrably fabric glue such as Fabri-Tac
Ribbon (I used GCD Studios adhesive ribbon, but you don't have to, you can just glue non-adhesive ribbon)
1. Adhere a piece of ribbon onto top of hair clip, leaving a small overhang to wrap underneath.

2. Wrap ends underneath. (I used a dab of glue - even with the adhesive ribbon - to attain a more permanent status, since after all, this is for children!)


Hairclips (got mine at Hobby Lobby for around $1)
Quick dry glue, preferrably fabric glue such as Fabri-Tac
Ribbon (I used GCD Studios adhesive ribbon, but you don't have to, you can just glue non-adhesive ribbon)
1. Adhere a piece of ribbon onto top of hair clip, leaving a small overhang to wrap underneath.
2. Wrap ends underneath. (I used a dab of glue - even with the adhesive ribbon - to attain a more permanent status, since after all, this is for children!)
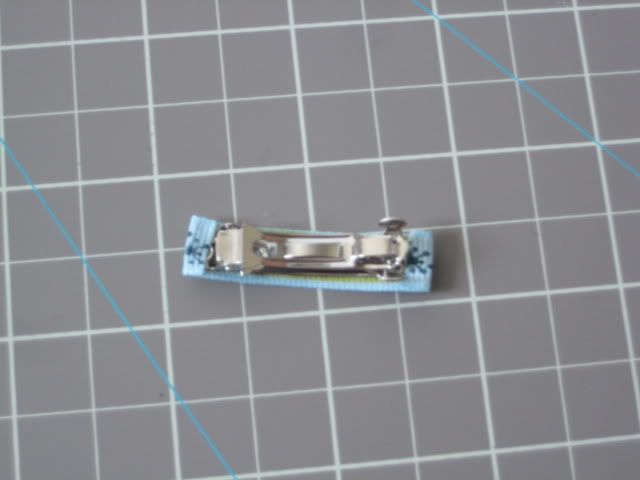
3. Cut a strip of ribbon long enough to create two loops. If you are using adhesive ribbon, don't pull the whole piece of backing off, but instead cut out the middle and ends (so that your bow won't be flat and stuck together).
Step 4: Create looped piece, and cut another small piece of ribbon to wrap around the clip and looped piece. Pop out the little piece along the top (see picture below) so you can secure the looped piece easier.
Step 5: When attaching pieces, I just added a dab of fabric glue to each step (the ends, the looped piece to the top, and the wrapped piece) for extra sturdiness.
Step 6: Voila! Make an army of these little cuties...they are so easy! =)
Wednesday, April 15, 2009
Coffee Filter Flowers for Mother's Day
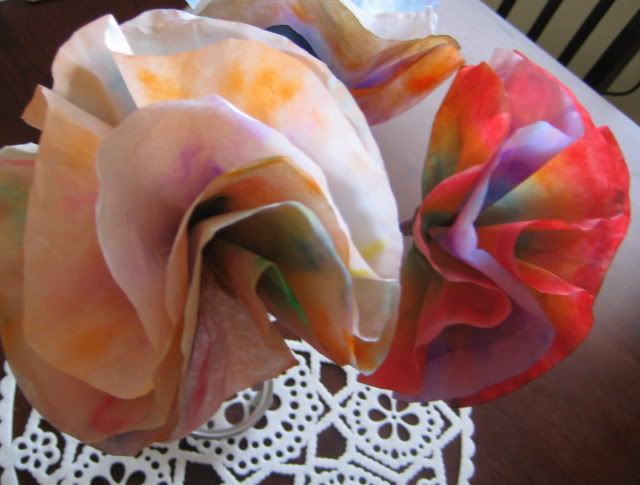
I hope I haven't posted about this already (if I have forgive me!) but this is how you can make fun, giant, coffee filter flowers.


What you need:
Washable Crayola Markers (bright colors work best)
Coffee Filters (the round, ruffly edge kind)
Paper Towels
A half-full glass of water
Paper Plates
Cheap Latex Gloves
White/Green Floral Stems (the wire kind, about 99 cents a pack)
1. Smooth and fold the coffee filter into fourths.
2. Color on both sides of the fourth firmly, keeping in mind that you can have eclectic designs (coloring in different places on both sides) or a pattern (by coloring the same pattern on both sides). Color heavily so that the ink sinks through to the center (open the coffee filter to check and make sure the color is bleeding through!)
3. When finished, gently place in water so that about 2/3 of the filter is submerged. The water should trickle up to the top, if not, gently poke down until the entire filter is wet and the colors have swirled.
4. Using the gloves, pull out the colorful coffee filter and gently open. Blot with a paper towel and lay on a paper plate to dry. You'll need fresh water each time you dunk. =)
5. Once you get three of four of these done and dried out, take the floral wire and poke it through the center of the layered coffee filters. Make a ring or knot at the top to look like a stamen, then twist the layers and the floral wire around the bottom to hold it in place. Use a little floral tape to really secure them (Scotch tape could work too!) Voila. Giant Paper Posies for mom!
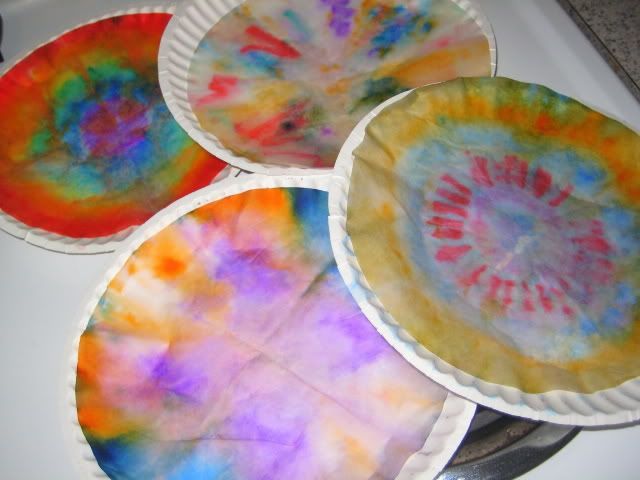
Thursday, April 2, 2009
Tidbits!
Picture Post of Happy Tidbits: 

 This layout I did awhile back was published in March's issue of Scrapbook Trends:
 Mmm...yummy breakfast!! =)
 Amber
Amber

 This layout I did awhile back was published in March's issue of Scrapbook Trends:
 Mmm...yummy breakfast!! =)
 Amber
AmberFriday, March 20, 2009
Crazy Crayons: How To & Lessons Learned
Step 1: Buy some cheap crayons (these were like 40 cents) or use some old ones you already have.
 Step 2: Get to peelin'. This is the toughest part. Takes a few minutes.
 Step 3: Break these up into small chunks (usually 3-4 breaks per crayon)
 Step 4: Place chunks into oven safe container of your choice. Lesson Learned: I used a metal Christmas tree pan and getting them out with all the delicate edges was tough. I would recommend silicone pans as they are bendable. If you use a silicone pan, it'd probably be best to place it on a cookie sheet for stability when moving it in and out of the oven.
Step 5: Heat in oven at around 350 for 8-10 minutes (until completely melted).
Step 6: Carefully remove from oven. Let cool. Lesson Learned: Avoid unnecessary jiggling and place in a out of the way place to cool. Melty crayon splashes from accidental bumps and nudges are hard to get up once they dry all over your pan and counter.
Step 2: Get to peelin'. This is the toughest part. Takes a few minutes. Step 3: Break these up into small chunks (usually 3-4 breaks per crayon)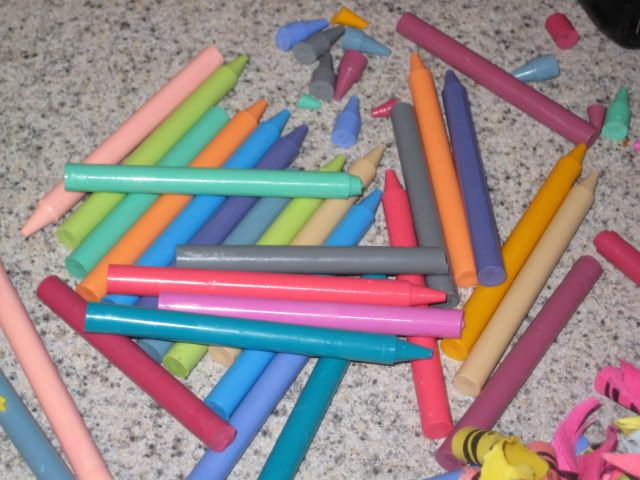 Step 4: Place chunks into oven safe container of your choice. Lesson Learned: I used a metal Christmas tree pan and getting them out with all the delicate edges was tough. I would recommend silicone pans as they are bendable. If you use a silicone pan, it'd probably be best to place it on a cookie sheet for stability when moving it in and out of the oven.
Step 5: Heat in oven at around 350 for 8-10 minutes (until completely melted).
Step 6: Carefully remove from oven. Let cool. Lesson Learned: Avoid unnecessary jiggling and place in a out of the way place to cool. Melty crayon splashes from accidental bumps and nudges are hard to get up once they dry all over your pan and counter.

Tuesday, March 3, 2009
Kids Crayons
I have always wanted to make "crazy crayons" using my old crayon pieces as a kid...my mom never got around to doing it (I think she thought the MANY instances of melted crayons in the car was enough for her..haha!)
I still want to. In fact, it is high on my list of things I want to make and tuck away for gifts. I ran across this site that sells silicone molds for making crayons, among many other things...in the shape of letters or numbers. Here is another link with recipes of different things you could use your silicone molds for...I think it's pretty ingenious. You could also use it to mold butter, chocolate, water (for ice) and a whole lot more. I think it would be so cute to use these individual number trays to make "crazy crayons" for a party favor...and for the ice cubes etc. 


In case this interests you, here are a few more links:
1. The story of Sillycone
2. Sillycone Letters + Numbers ON SALE
It's on my list of things I want to buy...right after garage shelving, a filing cabinet, a desk and new bookcase! Maybe with garage sale money! =)
I still want to. In fact, it is high on my list of things I want to make and tuck away for gifts. I ran across this site that sells silicone molds for making crayons, among many other things...in the shape of letters or numbers. Here is another link with recipes of different things you could use your silicone molds for...I think it's pretty ingenious. You could also use it to mold butter, chocolate, water (for ice) and a whole lot more. I think it would be so cute to use these individual number trays to make "crazy crayons" for a party favor...and for the ice cubes etc.
In case this interests you, here are a few more links:
1. The story of Sillycone
2. Sillycone Letters + Numbers ON SALE
It's on my list of things I want to buy...right after garage shelving, a filing cabinet, a desk and new bookcase! Maybe with garage sale money! =)
Monday, March 2, 2009
Jesus Loves Me!
This was my class bulletin board for the month of February...loved getting to use my big Cricut for it! (Thanks to my mother-in-law). Love the way this turned out...obviously love-inspired!

Thursday, February 19, 2009
Big Plans
...for today!
Already, I have filed our taxes and caught up on miscellaneous necessaties (bills, picking up, etc.) I have a list of things to be done today. What's new?
Yesterday was a dear friends 40TH birthday and I made this cute & easy card (it's a poster sheet folded in half) for her...with plenty of room for all the kids in our church class to "sign" it (translation: scribble!) Forgive the pictures...the lighting was really wretched!


 That's it for today! =) Amber
Tuesday, December 23, 2008
December, December!
How it flies! I have been taking tons of pictures, but not uploading them, and last night, for maybe the first time ever, I had a full memory card!!
So here's what I've been so busy doing and making:
Spending time with these sweet girls at our Sunday School Christmas Party

Packaging gifts and candy bags for our SonRisers I class:


Turning these items into an army of angel finger puppets:

 Making these goodie baskets (filled with sugar cookies, hot chocolate, cookie bars, rice krispies and more!)
  And wrapping gifts and taking pictures with these girls:
So here's what I've been so busy doing and making:
Spending time with these sweet girls at our Sunday School Christmas Party
Packaging gifts and candy bags for our SonRisers I class:

Turning these items into an army of angel finger puppets:

 Making these goodie baskets (filled with sugar cookies, hot chocolate, cookie bars, rice krispies and more!)
  And wrapping gifts and taking pictures with these girls:
Subscribe to:
Posts (Atom)
LinkWithin
